Assessment: DIY Django mini blog
In this assessment you'll use the Django knowledge you've picked up in the Django Web Framework (Python) module to create a very basic blog.
| Prerequisites: | Before attempting this assessment you should have already worked through all the articles in this module. |
|---|---|
| Objective: | To test comprehension of Django fundamentals, including URL configurations, models, views, forms, and templates. |
Project brief
The pages that need to be displayed, their URLs, and other requirements, are listed below:
| Page | URL | Requirements |
|---|---|---|
| Home page | / and /blog/ |
An index page describing the site. |
| List of all blog posts | /blog/blogs/ |
List of all blog posts:
|
| Blog author (blogger) detail page | /blog/blogger/<author-id> |
Information for a specified author (by id) and list of their blog posts:
|
| Blog post detail page | /blog/<blog-id> |
Blog post details.
|
| List of all bloggers | /blog/bloggers/ |
List of bloggers on system:
|
| Comment form page | /blog/<blog-id>/create |
Create comment for blog post:
|
| User authentication pages | /accounts/<standard urls> |
Standard Django authentication pages for logging in, out and setting the password:
|
| Admin site | /admin/<standard urls> |
Admin site should be enabled to allow create/edit/delete of blog posts, blog authors and blog comments (this is the mechanism for bloggers to create new blog posts):
|
In addition you should write some basic tests to verify:
- All model fields have the correct label and length.
- All models have the expected object name (e.g.
__str__()returns the expected value). - Models have the expected URL for individual Blog and Comment records (e.g.
get_absolute_url()returns the expected URL). - The BlogListView (all-blog page) is accessible at the expected location (e.g. /blog/blogs)
- The BlogListView (all-blog page) is accessible at the expected named URL (e.g. 'blogs')
- The BlogListView (all-blog page) uses the expected template (e.g. the default)
- The BlogListView paginates records by 5 (at least on the first page)
Note: There are of course many other tests you can run. Use your discretion, but we'll expect you to do at least the tests above.
The following section shows screenshots of a site that implements the requirements above.
Screenshots
The following screenshots provide an example of what the finished program should output.
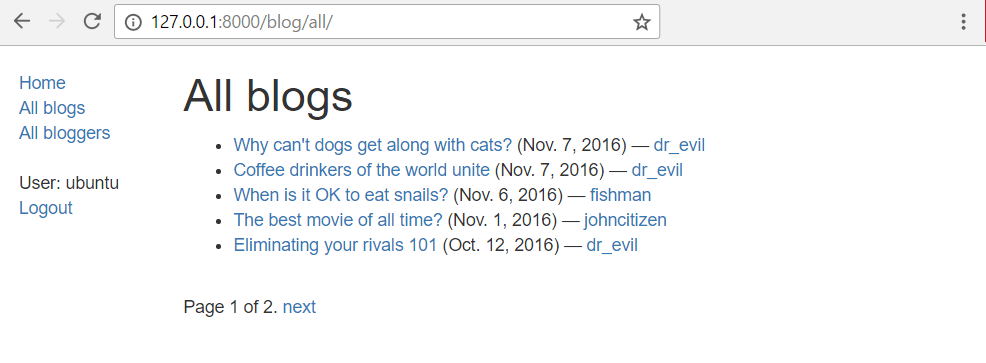
List of all blog posts
This displays the list of all blog posts (accessible from the "All blogs" link in the sidebar). Things to note:
- The sidebar also lists the logged in user.
- Individual blog posts and bloggers are accessible as links in the page.
- Pagination is enabled (in groups of 5)
- Ordering is newest to oldest.
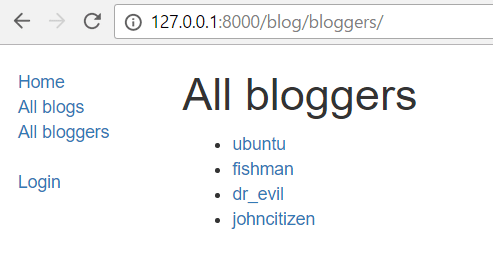
List of all bloggers
This provides links to all bloggers, as linked from the "All bloggers" link in the sidebar. In this case we can see from the sidebar that no user is logged in.
Blog detail page
This shows the detail page for a particular blog.
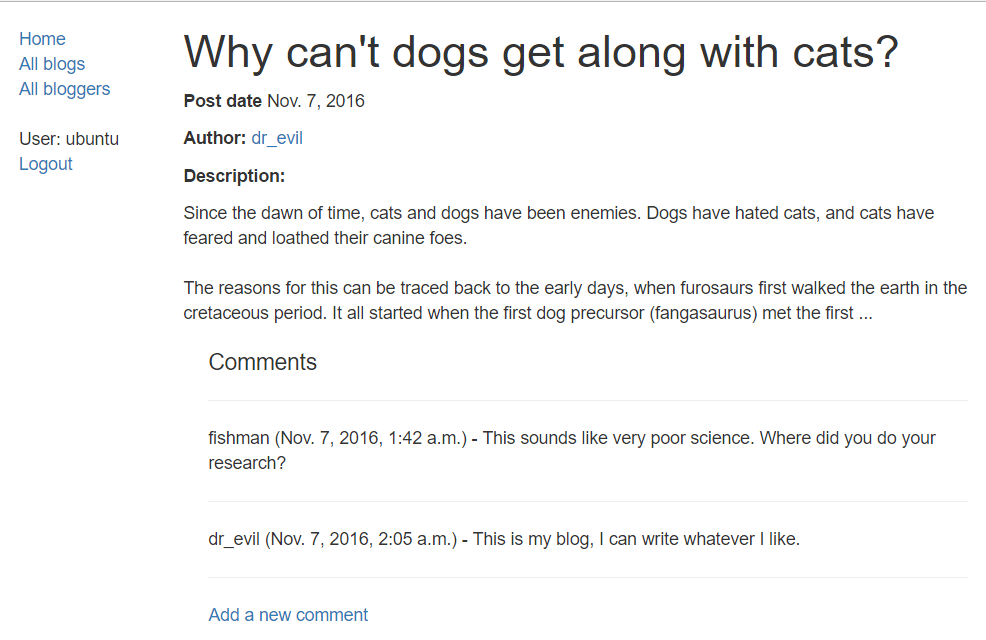
Note that the comments have a date and time, and are ordered from oldest to newest (opposite of blog ordering). At the end we have a link for accessing the form to add a new comment. If a user is not logged in we'd instead see a suggestion to log in.

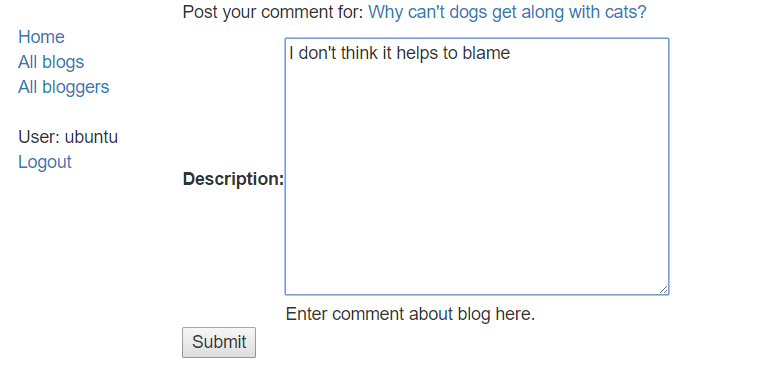
Add comment form
This is the form to add comments. Note that we're logged in. When this succeeds we should be taken back to the associated blog post page.
Author bio
This displays bio information for a blogger along with their blog posts list.

Steps to complete
The following sections describe what you need to do.
- Create a skeleton project and web application for the site (as described in Django Tutorial Part 2: Creating a skeleton website). You might use 'diyblog' for the project name and 'blog' for the application name.
- Create models for the Blog posts, Comments, and any other objects needed. When thinking about your design, remember:
- Each comment will have only one blog, but a blog may have many comments.
- Blog posts and comments must be sorted by post date.
- Not every user will necessarily be a blog author though any user may be a commenter.
- Blog authors must also include bio information.
- Run migrations for your new models and create a superuser.
- Use the admin site to create some example blog posts and blog comments.
- Create views, templates, and URL configurations for blog post and blogger list pages.
- Create views, templates, and URL configurations for blog post and blogger detail pages.
- Create a page with a form for adding new comments (remember to make this only available to logged in users!)
Hints and tips
This project is very similar to the LocalLibrary tutorial. You will be able to set up the skeleton, user login/logout behavior, support for static files, views, URLs, forms, base templates and admin site configuration using almost all the same approaches.
Some general hints:
- The index page can be implemented as a basic function view and template (just like for the locallibrary).
- The list view for blog posts and bloggers, and the detail view for blog posts can be created using the generic list and detail views.
- The list of blog posts for a particular author can be created by using a generic blog list view and filtering for blog objects that match the specified author.
- You will have to implement
get_queryset(self)to do the filtering (much like in our library classLoanedBooksAllListView) and get the author information from the URL. - You will also need to pass the name of the author to the page in the context. To do this in a class-based view you need to implement
get_context_data()(discussed below).
- You will have to implement
- The add comment form can be created using a function-based view (and associated model and form) or using a generic
CreateView. If you use aCreateView(recommended) then:- You will also need to pass the name of the blog post to the comment page in the context (implement
get_context_data()as discussed below). - The form should only display the comment "description" for user entry (date and associated blog post should not be editable). Since they won't be in the form itself, your code will need to set the comment's author in the
form_valid()function so it can be saved into the model (as described here — Django docs). In that same function we set the associated blog. A possible implementation is shown below (pkis a blog id passed in from the URL/URL configuration).pythondef form_valid(self, form): """ Add author and associated blog to form data before setting it as valid (so it is saved to model) """ #Add logged-in user as author of comment form.instance.author = self.request.user #Associate comment with blog based on passed id form.instance.blog=get_object_or_404(Blog, pk = self.kwargs['pk']) # Call super-class form validation behavior return super(BlogCommentCreate, self).form_valid(form) - You will need to provide a success URL to redirect to after the form validates; this should be the original blog. To do this you will need to override
get_success_url()and "reverse" the URL for the original blog. You can get the required blog ID using theself.kwargsattribute, as shown in theform_valid()method above.
- You will also need to pass the name of the blog post to the comment page in the context (implement
We briefly talked about passing a context to the template in a class-based view in the Django Tutorial Part 6: Generic list and detail views topic. To do this you need to override get_context_data() (first getting the existing context, updating it with whatever additional variables you want to pass to the template, and then returning the updated context). For example, the code fragment below shows how you can add a blogger object to the context based on their BlogAuthor id.
class SomeView(generic.ListView):
    # …

    def get_context_data(self, **kwargs):
        # Call the base implementation first to get a context
        context = super(SomeView, self).get_context_data(**kwargs)
        # Get the blogger object from the "pk" URL parameter and add it to the context
        context['blogger'] = get_object_or_404(BlogAuthor, pk = self.kwargs['pk'])
        return context
Assessment
The assessment for this task is available on GitHub here. This assessment is primarily based on how well your application meets the requirements we listed above, though there are some parts of the assessment that check your code uses appropriate models, and that you have written at least some test code. When you're done, you can check out the finished example which reflects a "full marks" project.
Once you've completed this module you've also finished all the MDN content for learning basic Django server-side website programming! We hope you enjoyed this module and feel you have a good grasp of the basics!