getUserMedia() による写真の撮影
この記事では、navigator.mediaDevices.getUserMedia() を使用して、 getUserMedia() に対応しているコンピューターや携帯電話のカメラにアクセスして写真を撮影する方法について示しています。
お望みならばデモに直接ジャンプすることもできます。
HTML のマークアップ
HTML のインターフェイス には、ストリーム・キャプチャパネルとプレゼンテーションパネルの2つの主要な操作セクションがあります。これらはそれぞれ自分自身で <div> の中に横に並んで表示され、スタイル設定や制御が容易にできるようになっています。
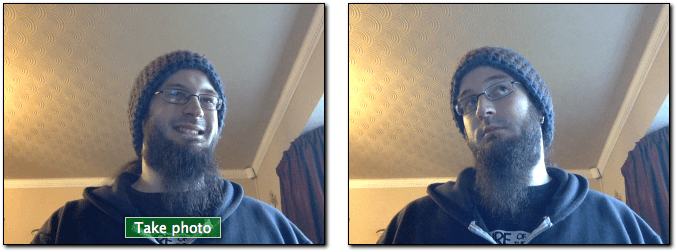
左側の最初のパネルには 2 つの構成要素があります。 <video> 要素は navigator.mediaDevices.getUserMedia() からストリームを受け取り、 <button> はユーザーがクリックすることで、映像のフレームをキャプチャすることができるものです。
<div class="camera">
  <video id="video">Video stream not available.</video>
  <button id="startbutton">Take photo</button>
</div>
これは直感的なもので、 JavaScript のコードを取得するときに、これらがどのように組み合わされているかを確認できます。
次に、 <canvas> 要素があります。この要素にキャプチャしたフレームを格納し、何らかの方法で操作した後、出力画像ファイルに変換する可能性があります。このキャンバスは、 display:none でスタイル設定することで非表示にし、画面が煩雑にならないようにしています(ユーザーはこの中間段階を見る必要がないため)。
また、画像を描画するための <img> 要素も保有しており、これがユーザーに見せる最終的な表示となります。
<canvas id="canvas"> </canvas>
<div class="output">
  <img id="photo" alt="The screen capture will appear in this box." />
</div>
それだけです。残りはページレイアウトと、このページへのリンクを提供するちょっとしたテキストだけです。
JavaScript のコード
これで、 JavaScript のコードを見ていきましょう。説明しやすいように、いくつか一口サイズに分割して説明します。
初期化
始めるには、グローバル変数を避けるためにスクリプト全体を無名関数でラップし、使用する様々な変数を設定します。
(() => {
  const width = 320;    // We will scale the photo width to this
  const height = 0;     // This will be computed based on the input stream

  const streaming = false;

  let video = null;
  let canvas = null;
  let photo = null;
  let startbutton = null;
変数は次の通りです。
width-
入力される映像のサイズが何であれ、出来上がった画像を幅 320 ピクセルになるように拡大縮小します。
height-
画像の出力高さは,ストリームの
widthとアスペクト比が指定された場合に計算されます. streaming-
現在、アクティブな動画ストリームが実行されているか否かを示します。
video-
これはページの読み込みが終わった後で、
<video>要素への参照になります。 canvas-
これはページの読み込みが終わった後で、
<canvas>要素への参照になります。 photo-
これはページの読み込みが終わった後で、
<img>要素への参照になります。 -
これはキャプチャを起動するために使用される
<button>要素への参照になります。 ページの読み込みが終わってから取得します。
startup() 関数
startup() 関数は EventTarget.addEventListener の指示により、ページの読み込みが完了したときに実行されます。この関数の仕事は、ユーザーのウェブカメラへのアクセスをリクエストし、出力先の <img> を既定の状態で初期化し、カメラからそれぞれの動画のフレームを受信するために必要なイベントリスナーを確立し、ボタンがクリックされたときに反応して画像をキャプチャすることです。
要素への参照の取得
最初に、アクセスできるようにする必要がある主要な要素への参照を取得します。
  function startup() {
    video = document.getElementById('video');
    canvas = document.getElementById('canvas');
    photo = document.getElementById('photo');
    startbutton = document.getElementById('startbutton');
メディアストリームの取得
次の仕事は、メディアストリームを取得することです。
navigator.mediaDevices
  .getUserMedia({ video: true, audio: false })
  .then((stream) => {
    video.srcObject = stream;
    video.play();
  })
  .catch((err) => {
    console.error(`An error occurred: ${err}`);
  });
ここでは MediaDevices.getUserMedia() を呼び出して、(音声なしの)映像ストリームをリクエストしています。これはプロミスを返し、これに成功と失敗のコールバックを接続しています。
成功コールバックは、入力として stream オブジェクトを受け取ります。これは <video> 要素のソースであり、新しいストリームになります。
ストリームが <video> 要素にリンクされると、 HTMLMediaElement.play() を呼び出して再生を開始することができます。
エラーコールバックは、ストリームを開くことがうまくいかない場合に呼び出されます。これは例えば、互換性のあるカメラが接続されていない場合や、ユーザーがアクセスを拒否した場合などに起こります。
映像の再生が始まるのを待ち受けする
HTMLMediaElement.play() を <video> に対して呼び出した後、映像のストリームが流れ始めるまでに(期待する短い時間ですが)経過する時刻があります。そうなるまでブロックされることを避けるために、 video に canplay イベント用のイベントリスナーを追加し、映像の再生が実際に始まると配信されるようにします。この点で、 video オブジェクトのすべてのプロパティは、ストリームの形式に基づいて設定されています。
video.addEventListener(
  "canplay",
  (ev) => {
    if (!streaming) {
      height = (video.videoHeight / video.videoWidth) * width;

      video.setAttribute("width", width);
      video.setAttribute("height", height);
      canvas.setAttribute("width", width);
      canvas.setAttribute("height", height);
      streaming = true;
    }
  },
  false,
);
このコールバックは、初めて呼び出されたとき以外は何もしません。このテストでは、変数 streaming の値を確認し、このメソッドが最初に実行されたときは false になっていることを確認します。
このメソッドが最初に実行された場合は、動画の実際のサイズである video.videoWidth とレンダリングする幅である width のサイズ差に基づいて、動画の高さを設定します。
最後に、動画とキャンバスの両方の width と height を、それぞれの要素の 2 つのプロパティのそれぞれに対して Element.setAttribute() を呼び出して、適切な幅と高さを設定することによって、互いに一致するように設定します。最後に、誤ってこの設定コードを再度実行しないように、変数 streaming に true を設定しています。
ボタンのクリックを処理する
ユーザーが startbutton をクリックするたびに静止画を撮影するには、ボタンにイベントリスナーを追加して、 click イベントが発行されたときに呼び出されるようにする必要があります。
startbutton.addEventListener(
  "click",
  (ev) => {
    takepicture();
    ev.preventDefault();
  },
  false,
);
このメソッドは単純で、下記のストリームからのフレームのキャプチャ で定義されている takepicture() 関数を呼び出した後、受け取ったイベントで Event.preventDefault() を呼び、クリック処理が複数回行われないようにするだけです。
startup() メソッドの締め
startup()` メソッドには、あと 2 行のコードがあるだけです。
    clearphoto();
  }
ここで、下記の写真ボックスのクリア の項で記述する clearphoto() メソッドを呼び出すことになります。
写真ボックスのクリア
写真ボックスをクリアするには、画像を作成し、それを <img> 要素で使用可能な形式に変換して、最も最近撮影したフレームを表示する必要があります。そのコードは次のようになります。
function clearphoto() {
  const context = canvas.getContext("2d");
  context.fillStyle = "#AAA";
  context.fillRect(0, 0, canvas.width, canvas.height);

  const data = canvas.toDataURL("image/png");
  photo.setAttribute("src", data);
}
まず、オフスクリーンレンダリングに使用する非表示の <canvas> 要素への参照を取得することから始めます。次に、fillStyle を #AAA (かなり明るい灰色) に設定し、fillRect() を呼び出してキャンバス全体をその色で塗りつぶします。
最後に、キャンバスを PNG 画像に変換して photo.setAttribute() を呼び出し、キャプチャした静止画を表示させています。
ストリームからのフレームのキャプチャ
定義する最後の関数があり、この点がこの演習のポイントです。 takepicture() 関数は、現在表示されている動画フレームをキャプチャし、 PNG ファイルに変換して、キャプチャしたフレーム枠に表示するのがその仕事です。コードは次のようになります。
function takepicture() {
  const context = canvas.getContext("2d");
  if (width && height) {
    canvas.width = width;
    canvas.height = height;
    context.drawImage(video, 0, 0, width, height);

    const data = canvas.toDataURL("image/png");
    photo.setAttribute("src", data);
  } else {
    clearphoto();
  }
}
キャンバスのコンテンツを操作する必要があるときはいつでもそうですが、まず非表示のキャンバスの 2D 描画コンテキストを取得することから始めます。
次に、幅と高さがどちらも 0 でない場合(少なくとも有効な画像データがある可能性があるということ)、キャンバスの幅と高さをキャプチャしたフレームの幅と高さに一致するように設定し、 drawImage() を呼び出して動画の現在のフレームをコンテキストに描き、全体の画像をキャンバスで塗りつぶすようにします。
メモ: このインターフェイスは、HTMLImageElement を引数として受け入れる任意の API からは HTMLVideoElement が HTMLImageElement のように見えることを利用しており、動画の現在のフレームが画像のコンテンツとして表示されるように工夫されています。
キャンバスにはキャプチャした画像が格納されたら、HTMLCanvasElement.toDataURL() を呼び出して PNG 形式に変換し、最後に photo.setAttribute() を呼び出してキャプチャした静止画ボックスにその画像を表示させます。
利用できる有効な画像がない場合(つまり、width と height がどちらも 0 の場合)は、clearphoto() を呼び出して、キャプチャしたフレームボックスのコンテンツを消去します。
デモ
HTML
<div class="contentarea">
  <h1>MDN - navigator.mediaDevices.getUserMedia(): Still photo capture demo</h1>
  <p>
    This example demonstrates how to set up a media stream using your built-in
    webcam, fetch an image from that stream, and create a PNG using that image.
  </p>
  <div class="camera">
    <video id="video">Video stream not available.</video>
    <button id="startbutton">Take photo</button>
  </div>
  <canvas id="canvas"> </canvas>
  <div class="output">
    <img id="photo" alt="The screen capture will appear in this box." />
  </div>
  <p>
    Visit our article
    <a
      href="https://developer.mozilla.org/ja/docs/Web/API/WebRTC_API/Taking_still_photos">
      Taking still photos with WebRTC</a
    >
    to learn more about the technologies used here.
  </p>
</div>
CSS
#video {
  border: 1px solid black;
  box-shadow: 2px 2px 3px black;
  width: 320px;
  height: 240px;
}

#photo {
  border: 1px solid black;
  box-shadow: 2px 2px 3px black;
  width: 320px;
  height: 240px;
}

#canvas {
  display: none;
}

.camera {
  width: 340px;
  display: inline-block;
}

.output {
  width: 340px;
  display: inline-block;
  vertical-align: top;
}

#startbutton {
  display: block;
  position: relative;
  margin-left: auto;
  margin-right: auto;
  bottom: 32px;
  background-color: rgba(0, 150, 0, 0.5);
  border: 1px solid rgba(255, 255, 255, 0.7);
  box-shadow: 0px 0px 1px 2px rgba(0, 0, 0, 0.2);
  font-size: 14px;
  font-family: "Lucida Grande", "Arial", sans-serif;
  color: rgba(255, 255, 255, 1);
}

.contentarea {
  font-size: 16px;
  font-family: "Lucida Grande", "Arial", sans-serif;
  width: 760px;
}
JavaScript
(() => {
  // The width and height of the captured photo. We will set the
  // width to the value defined here, but the height will be
  // calculated based on the aspect ratio of the input stream.

  const width = 320; // We will scale the photo width to this
  let height = 0; // This will be computed based on the input stream

  // |streaming| indicates whether or not we're currently streaming
  // video from the camera. Obviously, we start at false.

  let streaming = false;

  // The various HTML elements we need to configure or control. These
  // will be set by the startup() function.

  let video = null;
  let canvas = null;
  let photo = null;
  let startbutton = null;

  function showViewLiveResultButton() {
    if (window.self !== window.top) {
      // Ensure that if our document is in a frame, we get the user
      // to first open it in its own tab or window. Otherwise, it
      // won't be able to request permission for camera access.
      document.querySelector(".contentarea").remove();
      const button = document.createElement("button");
      button.textContent = "View live result of the example code above";
      document.body.append(button);
      button.addEventListener("click", () => window.open(location.href));
      return true;
    }
    return false;
  }

  function startup() {
    if (showViewLiveResultButton()) {
      return;
    }
    video = document.getElementById("video");
    canvas = document.getElementById("canvas");
    photo = document.getElementById("photo");
    startbutton = document.getElementById("startbutton");

    navigator.mediaDevices
      .getUserMedia({ video: true, audio: false })
      .then((stream) => {
        video.srcObject = stream;
        video.play();
      })
      .catch((err) => {
        console.error(`An error occurred: ${err}`);
      });

    video.addEventListener(
      "canplay",
      (ev) => {
        if (!streaming) {
          height = video.videoHeight / (video.videoWidth / width);

          // Firefox currently has a bug where the height can't be read from
          // the video, so we will make assumptions if this happens.

          if (isNaN(height)) {
            height = width / (4 / 3);
          }

          video.setAttribute("width", width);
          video.setAttribute("height", height);
          canvas.setAttribute("width", width);
          canvas.setAttribute("height", height);
          streaming = true;
        }
      },
      false,
    );

    startbutton.addEventListener(
      "click",
      (ev) => {
        takepicture();
        ev.preventDefault();
      },
      false,
    );

    clearphoto();
  }

  // Fill the photo with an indication that none has been
  // captured.

  function clearphoto() {
    const context = canvas.getContext("2d");
    context.fillStyle = "#AAA";
    context.fillRect(0, 0, canvas.width, canvas.height);

    const data = canvas.toDataURL("image/png");
    photo.setAttribute("src", data);
  }

  // Capture a photo by fetching the current contents of the video
  // and drawing it into a canvas, then converting that to a PNG
  // format data URL. By drawing it on an offscreen canvas and then
  // drawing that to the screen, we can change its size and/or apply
  // other changes before drawing it.

  function takepicture() {
    const context = canvas.getContext("2d");
    if (width && height) {
      canvas.width = width;
      canvas.height = height;
      context.drawImage(video, 0, 0, width, height);

      const data = canvas.toDataURL("image/png");
      photo.setAttribute("src", data);
    } else {
      clearphoto();
    }
  }

  // Set up our event listener to run the startup process
  // once loading is complete.
  window.addEventListener("load", startup, false);
})();
結果
フィルターで楽しむ
<video> 要素からフレームを取得することによって、ユーザーのウェブカメラから画像をキャプチャしているので、映像にフィルターや楽しい効果をとても簡単に適用することができます。結局のところ、 filter プロパティを使用して要素に適用した CSS フィルターは、キャプチャした写真に影響を与えます。これらのフィルターは、単純なもの(画像を白黒にする)から極端なもの(ガウスぼかしや色相回転)までの範囲があります。
この効果は例えば、 Firefox の開発者ツールのスタイルエディターで再生することができます。やり方の詳細は CSS フィルターの編集を参照してください。
特定の機器の使用
必要に応じて、許可される動画ソースのセットを特定の機器または一連の機器に制限することができます。これを行うには、MediaDevices.enumerateDevices を呼び出します。利用できる機器を記述した MediaDeviceInfo オブジェクトの配列でプロミスが履行されたら、許可したいものを探し、 getUserMedia() に渡される MediaTrackConstraints (en-US) オブジェクトで対応する deviceId (en-US) または deviceId を指定します。